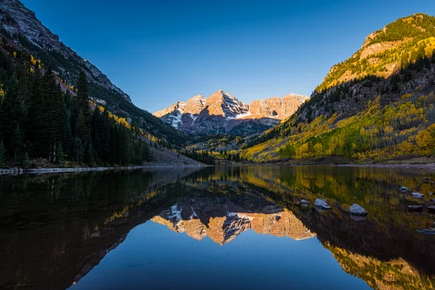
Landscape photography offers endless possibilities for creativity and expression. From sweeping mountain ranges to tranquil beach scenes, capturing the beauty of nature is an incredibly rewarding pursuit. The key to creating stunning landscape photos lies in mastering a few essential techniques, such as composition, lighting, and post-processing. Once you’ve captured your masterpiece, displaying it on the right medium can elevate its impact. For example, printing your landscape photo on panoramic canvas prints can add a striking dimension, making the most of wide, expansive scenes.
Essential Tips for Capturing Landscape Photos
- Master the Composition
Composition is the backbone of any good landscape photograph. Whether you’re photographing a vast desert or a small forest scene, the way you frame your shot will greatly impact the overall feel of the image. The rule of thirds is a classic compositional technique where you divide the frame into nine equal parts using two horizontal and two vertical lines. Place your subject or key elements along these lines or at their intersections to create balance and visual interest.Another helpful tip is to use leading lines such as roads, rivers, or fences to draw the viewer’s eye into the photograph. These lines can create a sense of depth and guide the viewer toward the main subject of the photo. - Focus on Lighting
Good lighting can make or break a landscape photo. The golden hours—just after sunrise and just before sunset—are when the light is soft, warm, and perfect for capturing stunning landscape shots. During this time, shadows are longer, and the warm hues add depth and texture to the scene. This period is often referred to as “golden hour” in photography, and it’s a time you don’t want to miss.When shooting landscapes during midday, when the light is harsh, you may want to adjust your approach. Use a polarizing filter to reduce glare from the sky and water, and consider shooting in black and white to focus on the tonal contrasts rather than colors. - Use a Tripod for Stability
Landscape photography often requires longer exposure times, especially when shooting in low light or capturing moving elements like water or clouds. A tripod is essential for maintaining sharp focus and preventing camera shake. By using a tripod, you can also experiment with long exposures to capture the motion of clouds or flowing water, which can add a dynamic element to your photos. - Choose the Right Lens
The lens you use for landscape photography will significantly affect your image. A wide-angle lens is a popular choice for landscape shots because it allows you to capture expansive scenes. Lenses in the 16mm to 35mm range are often ideal, allowing you to frame large landscapes while maintaining sharp focus from foreground to background.If you’re shooting a more focused scene, such as a lone tree or a mountain peak, a telephoto lens can help you isolate specific elements in the landscape and compress the scene for a different perspective. - Incorporate Foreground Interest
Including a strong foreground element can add depth and scale to your landscape photos. For example, rocks, flowers, or a path leading into the scene can create a sense of perspective and guide the viewer’s eye through the image. Having a foreground also helps create a stronger connection between the viewer and the scene, making it feel more immersive.
Post-Processing Your Landscape Photos
Post-processing allows you to enhance the details and colors of your landscape photos. While it’s important to get the exposure and composition right in-camera, editing can bring out the full potential of your image. Here are a few techniques to keep in mind:
- Adjusting Exposure
Fine-tune the exposure levels to ensure that the highlights aren’t blown out and the shadows retain detail. If your image looks too dark, increase the exposure; if it’s too bright, decrease it. - Enhancing Colors
Boosting the saturation and vibrancy of your colors can make a landscape photo feel more alive. However, be cautious of overdoing it, as this can make the image appear unnatural. Adjusting the white balance can also help balance the colors and give your photo the desired warmth or coolness. - Sharpening and Clarity
Adding some sharpening to the image can help bring out fine details, especially in areas like textures in rocks, trees, or clouds. The clarity tool, which enhances midtone contrast, can also help add a bit of punch to your landscape images.
Creative Ways to Display Landscape Photos
Once you’ve captured a stunning landscape photo, it’s time to think about how to display it. A simple, yet powerful, option is to print your landscape photo on canvas. Panoramic canvas prints are an excellent choice for wide, sweeping landscapes, as they enhance the grandeur of the scene. These prints can transform your space by providing a sense of depth and drama.
Canvas prints also provide texture and vibrancy to your images, making them ideal for capturing the richness of nature. You can display panoramic prints in large spaces like living rooms or hallways to create a focal point that draws the eye and captures the beauty of the natural world.
Landscape photography is an art form that allows you to connect with the natural world and capture its beauty. With the right techniques, such as mastering composition, understanding lighting, and using a tripod, you can create breathtaking images that showcase nature in its most captivating light. Once you’ve perfected your shots, display them with pride—consider the dramatic effect of panoramic canvas prints to bring your images to life on your walls.